1.语音识别接口
为了实现微信公众号与用户的多样化交互, 本章进行处理用户语音消息的开发.
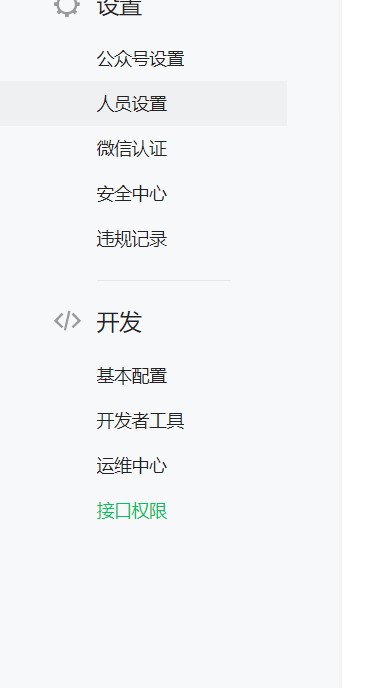
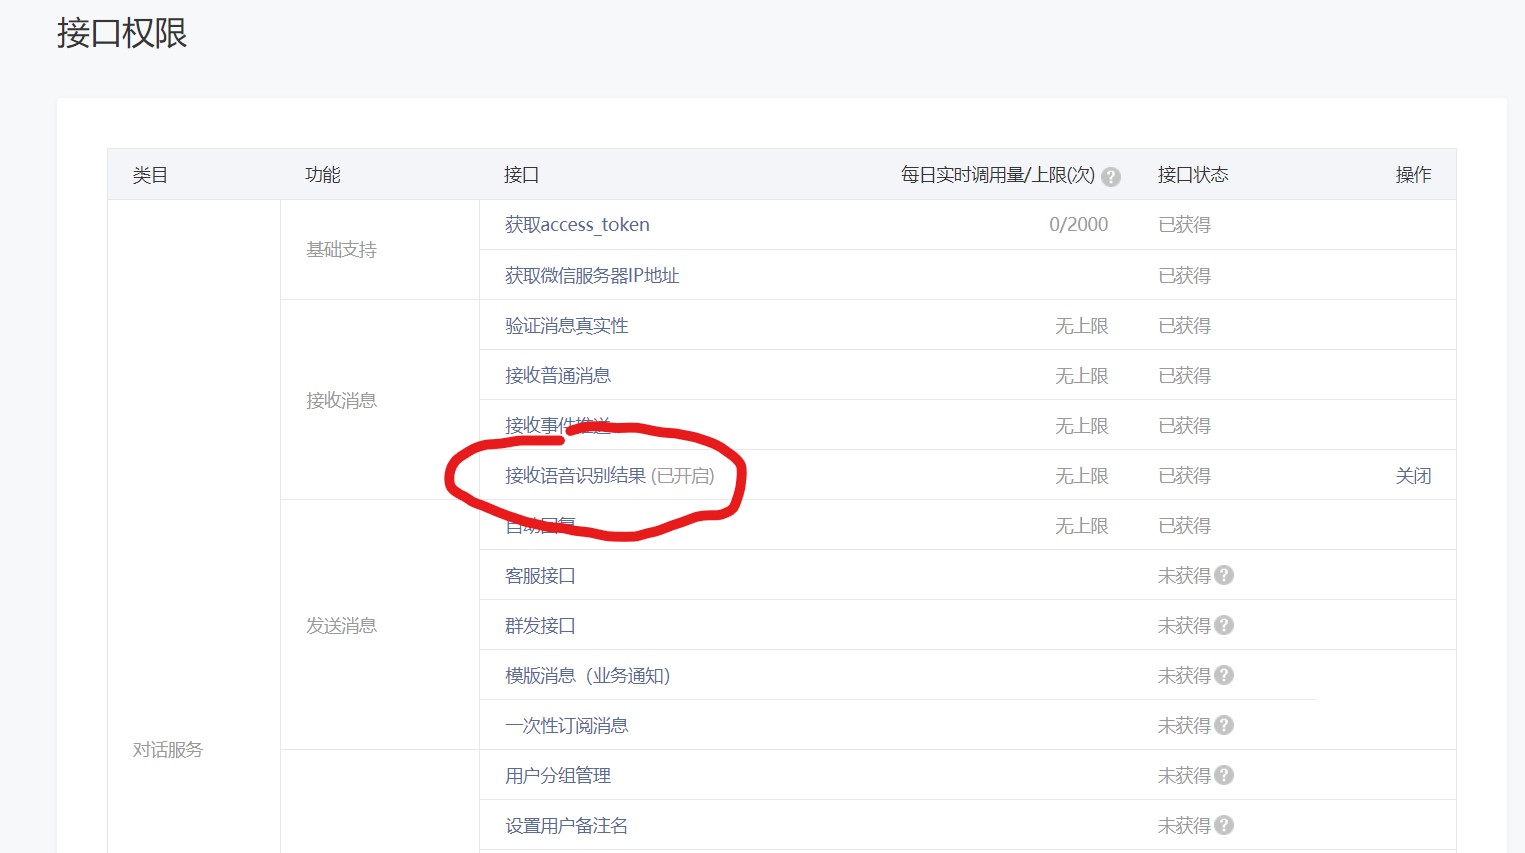
开发者进入微信公众平台 https://mp.weixin.qq.com/ —接口权限—对话服务—接受消息—打开接收语音识别结果接口权限
![]()
![]()
2.获取语音识别结果
请注意,开通语音识别后,用户每次发送语音给公众号时,微信会在推送的语音消息XML数据包中,增加一个Recognition字段(注:由于客户端缓存,开发者开启或者关闭语音识别功能,对新关注者立刻生效,对已关注用户需要24小时生效。开发者可以重新关注此帐号进行测试)。
开启语音识别后的语音XML数据包如下:
1
2
3
4
5
6
7
8
9
10
| <xml>
<ToUserName>< ![CDATA[toUser] ]></ToUserName>
<FromUserName>< ![CDATA[fromUser] ]></FromUserName>
<CreateTime>1357290913</CreateTime>
<MsgType>< ![CDATA[voice] ]></MsgType>
<MediaId>< ![CDATA[media_id] ]></MediaId>
<Format>< ![CDATA[Format] ]></Format>
<Recognition>< ![CDATA[腾讯微信团队] ]></Recognition>
<MsgId>1234567890123456</MsgId>
</xml>
|
语音消息参数说明
![]()
开通语音识别功能以后,用户每次发送语音给微信公众号,微信会在推送语音消息XML数据包中添加一个Recongnition字段,该字段为语音识别出的文本内容.
3.功能实现
实体类VoiceMessage
1
2
3
4
| @Data
public class VoiceMessage extends BaseMessage{
private String Recognition;
}
|
MessageUtil
1
2
3
4
| public static String voiceMessageToXml(VoiceMessage voiceMessage) {
xstream.alias("xml", voiceMessage.getClass());
return xstream.toXML(voiceMessage);
}
|
MsgService
1
2
3
4
5
6
7
8
9
10
11
12
13
14
15
16
17
18
19
20
21
22
23
24
25
26
27
28
29
30
31
32
33
34
35
36
37
38
39
40
41
42
43
44
45
46
47
48
49
50
51
52
53
54
55
56
57
58
59
60
61
62
63
64
65
66
67
68
69
70
71
72
73
74
75
76
77
| @Service
public class MsgService {
private static final Logger LOGGER = LoggerFactory.getLogger(MsgService.class);
public String processRequest(HttpServletRequest request) {
String respMessage = null;
System.out.println(LocalDateTime.now().format(DateTimeFormatter.ofPattern("yyyy-MM-dd HH:mm:ss")));
try {
Map<String, String> requestMap = MessageUtil.xmlToMap(request);
String fromUserName = requestMap.get("FromUserName");
String toUserName = requestMap.get("ToUserName");
String msgType = requestMap.get("MsgType");
String content = requestMap.get("Content");
String recognition = requestMap.get("Recognition");
LOGGER.info("FromUserName is:" + fromUserName + ", ToUserName is:" + toUserName + ", MsgType is:" + msgType);
if (msgType.equals(MessageUtil.REQ_MESSAGE_TYPE_VOICE)){
System.out.println(recognition);
if(recognition.indexOf("环境信息")!=-1){
Map map = IoTPopApiUtil.IoTpop();
Map ioTpop = JSON.parseObject(JSONObject.toJSONString(map), Map.class);
Object data = ioTpop.get("data");
String str = data.toString();
int index=str.indexOf("[");
String result=str.substring(index);
String jsonStr = result.substring(0, result.length() - 1);
JSONArray array = JSONArray.parseArray(jsonStr);
List<Pi> pi = JSONObject.parseArray(array.toJSONString(),Pi.class);
String returnText="当前温度:"+pi.get(3).getValue()+"°C"+"\n"
+"当前湿度:"+pi.get(2).getValue()+"%"+"\n"
+"当前光照强度:"+pi.get(4).getValue()+"Lux"+"\n"
+"当前气压:"+pi.get(1).getValue()+"hPa"+"\n"
+"当前海拔:"+pi.get(0).getValue()+"m"+"\n"
+"降雨情况:"+(pi.get(5).getValue()==1?"降雨":"未降雨");
TextMessage text = new TextMessage();
text.setContent(returnText);
text.setToUserName(fromUserName);
text.setFromUserName(toUserName);
text.setCreateTime(LocalDateTime.now().format(DateTimeFormatter.ofPattern("yyyy-MM-dd HH:mm:ss")));
text.setMsgType(MessageUtil.RESP_MESSAGE_TYPE_TEXT);
respMessage = MessageUtil.textMessageToXml(text);
}
if(recognition.indexOf("天气")!=-1){
NewsMessage newmsg = new NewsMessage();
newmsg.setToUserName(fromUserName);
newmsg.setFromUserName(toUserName);
newmsg.setCreateTime(LocalDateTime.now().format(DateTimeFormatter.ofPattern("yyyy-MM-dd HH:mm:ss")));
newmsg.setMsgType(MessageUtil.RESP_MESSAGE_TYPE_NEWS);
newmsg.setFuncFlag(0);
List<Article> articleList = new ArrayList<>();
Article article = new Article();
article.setTitle("天气预报");
article.setDescription("点击了解未来天气详情...");
article.setPicUrl("https://xxxx.oss-cn-beijing.aliyuncs.com/ep.png");
article.setUrl("https://widget-page.heweather.net/h5/index.html?bg=1&md=0123456&lc=accu&key=4bdfe35a67bb4b53bee844f6ce7a4b5c");
articleList.add(article);
newmsg.setArticleCount(articleList.size());
newmsg.setArticles(articleList);
respMessage = MessageUtil.newsMessageToXml(newmsg);
}
}
} catch (Exception e) {
LOGGER.error("error......");
}
return respMessage;
}
}
|
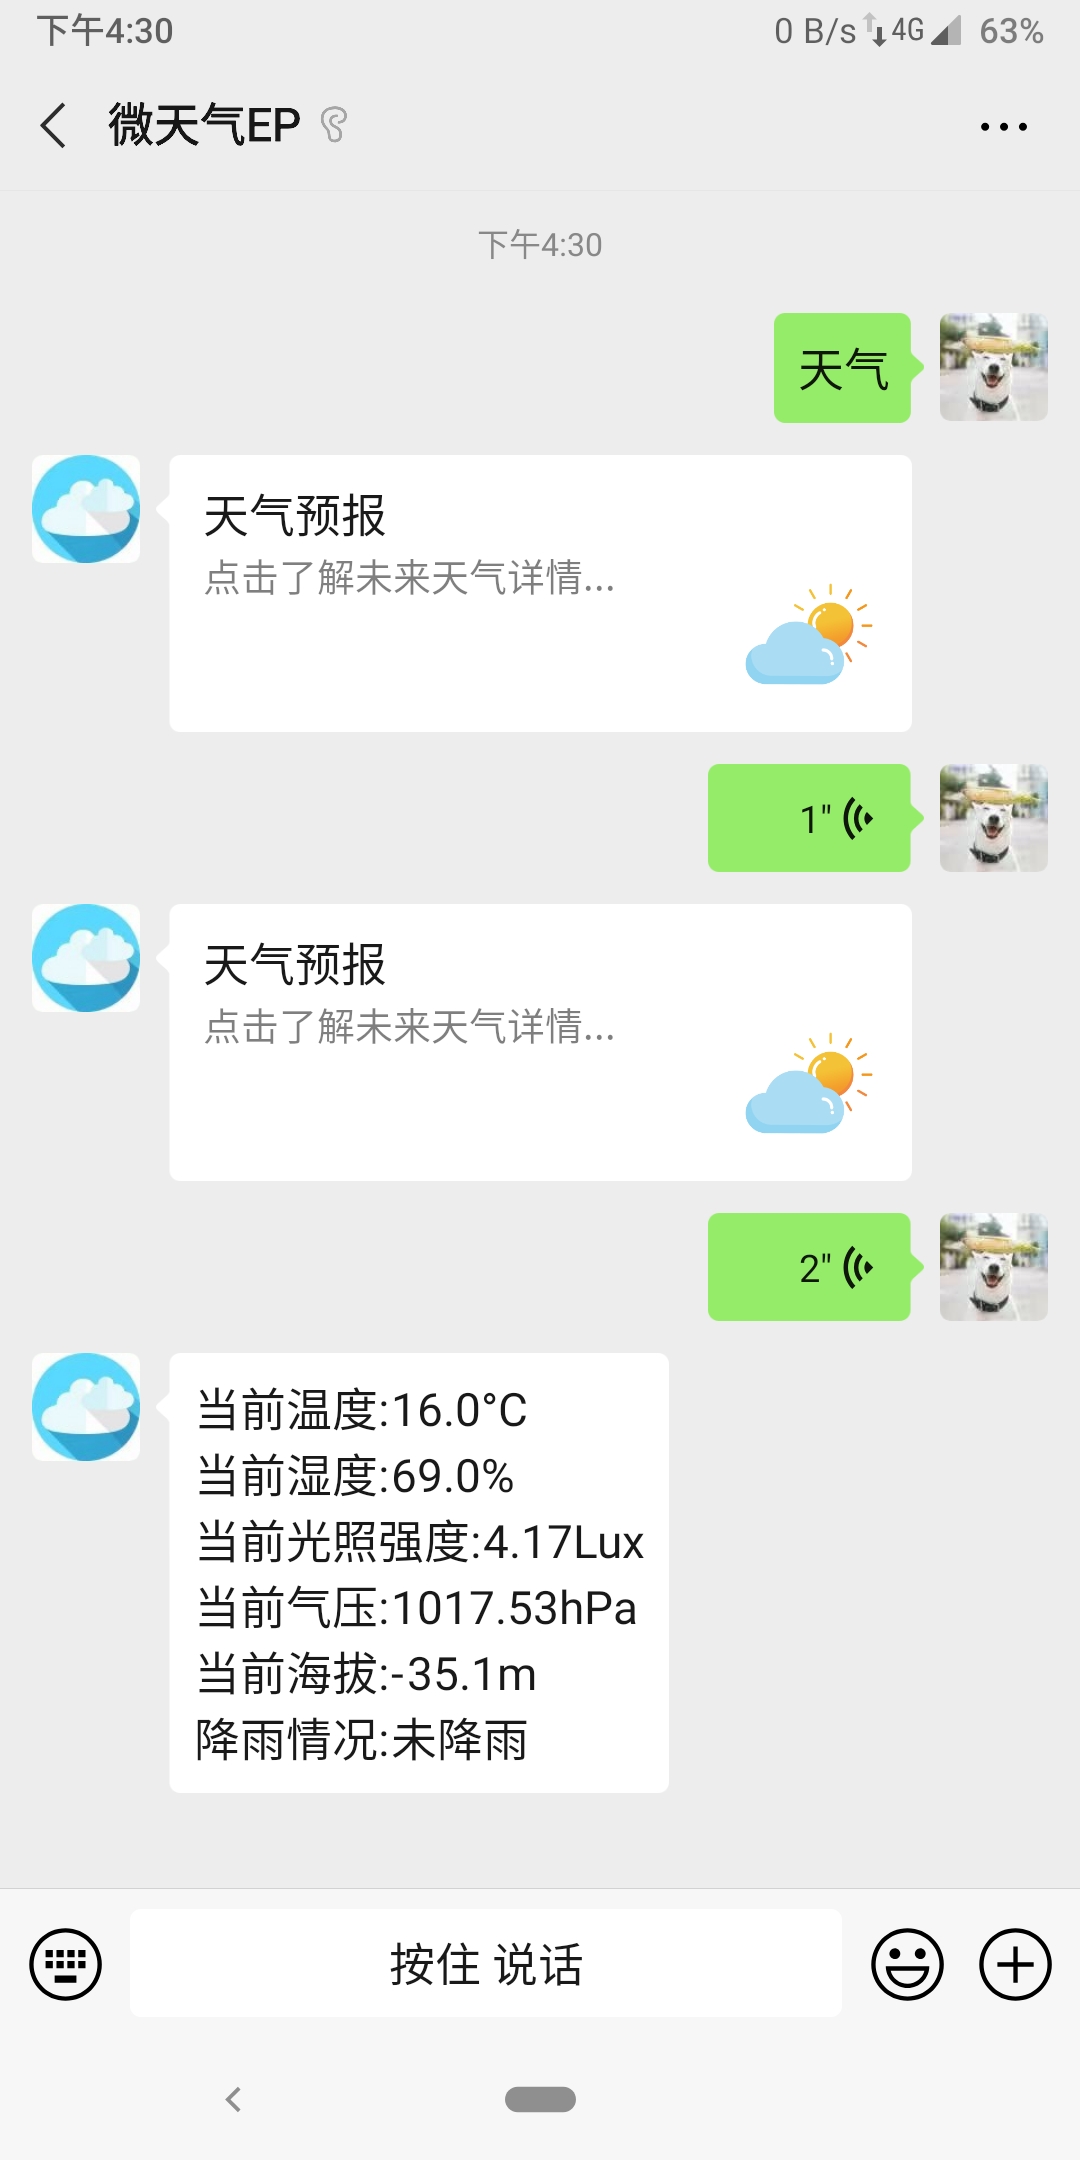
4.测试
![]()
![]()


